Battery terminals play a crucial role in the functioning of a battery, and understanding them is essential for maintaining and replacing batteries. This article will answer frequently asked questions about battery terminals, their types, identification methods, installation, and maintenance.
Part 1. What is a battery terminal called?
A battery terminal is the point of contact between the battery and the external circuit. It is where electrical current flows into or out of the battery. The battery terminal consists of a positive terminal, also known as the anode, and a negative terminal, the cathode.

Part 2. How do you identify battery terminals?
Identifying battery terminals is relatively simple. Most batteries have markings indicating the positive (+) and negative (-) terminals. The positive terminal usually has a larger diameter. It may be marked with a plus sign or the letters “POS” or “P.” The negative terminal is typically smaller and marked with a minus sign or the letters “NEG” or “N.”
Part 3. What are the three types of battery terminals?
There are three main types of battery terminals:
Post terminals
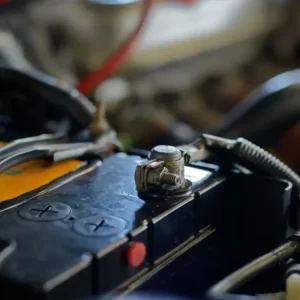
These are the most common type and consist of a round post that extends from the battery. They often require a wrench for installation and are commonly found in automotive batteries.
Stud terminals
Stud terminals have a threaded stud on top of the battery, which allows for a secure connection using a nut and washer. These terminals are commonly found in industrial batteries and marine applications.
Lug terminals
Lug terminals have a flat, rectangular shape with holes for bolting onto the battery. They are often used in high-amperage applications, such as heavy equipment or power backup systems.
Part 4. What are the 4 terminals on a battery?
Here are four common types of terminals you may encounter:
- Positive terminal: It is the main terminal through which electrical current flows out of the battery to power the connected devices.
- Negative terminal: This terminal receives electrical current from the external circuit and completes the battery’s circuit.
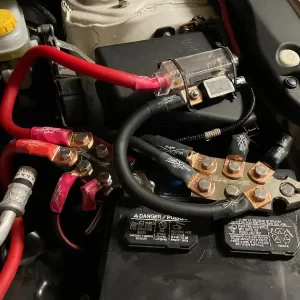
- Auxiliary terminals: Some batteries, such as those used in vehicles, may have additional terminals for connecting accessories like car audio systems or auxiliary power sources. For example, PTC (Positive Temperature Coefficient) or NTC (Negative Temperature Coefficient) devices are used for temperature control or protection.
- Sensor terminals: Certain batteries, particularly in advanced electronic devices, may feature sensor terminals that provide information about the battery’s status or enable communication with the device’s control system. For example, a lithium-ion battery used in a smartphone may have sensor terminals that allow the device to monitor the battery’s temperature or voltage.
Part 5. How to replace battery terminals?

Replacing battery terminals can be done with a few simple steps:
- Put on your protective gear: Wear protective gear, such as gloves and glasses, to prevent accidents or battery acid exposure.
- Disconnect the battery: Start by disconnecting the battery from the vehicle or device. Remove any cables or connectors attached to the terminals.
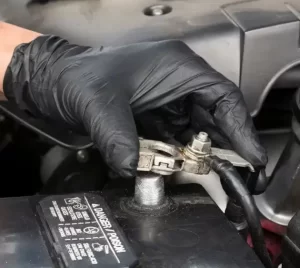
- Remove the old terminals: Loosen and remove the nuts or bolts securing the old terminals. Carefully detach them from the battery posts, ensuring they do not damage the posts or surrounding components.
- Clean the posts: Thoroughly clean the battery posts using a battery post brush or a mixture of baking soda and water. This removes any corrosion or buildup affecting the new terminals’ connection.
- Attach the new terminals: Place them over the battery posts and secure them using the appropriate nuts or bolts. Ensure they are tightened securely but not over-tightened, which may damage the terminals or posts.
- Reconnect the battery: Reattach the cables or connectors to their respective terminals, starting with the negative and positive terminals. Double-check that all connections are secure.
Part 6. When connecting a battery, which terminal first?
When connecting a battery, it is essential to follow the correct sequence to minimize the risk of electrical hazards. The general rule of thumb is to connect the positive terminal first and then the negative terminal. This order prevents accidental short circuits and ensures a safer connection.
Part 7. Is it better to solder or crimp battery terminals?
The choice between soldering and crimping battery terminals depends on various factors, including the application and personal preference. Both methods can create reliable connections when done correctly.
Soldering involves melting a metal alloy (solder) to create a solid electrical connection between the battery terminal and the wire. It requires a soldering iron and soldering wire.
Crimping is a method that uses a crimping tool to compress a metal sleeve or connector onto the wire and battery terminal, creating a secure connection.
However, soldering is generally considered more secure and durable, creating a solid bond between the wire and terminal. Conversely, crimping is quicker and easier, requiring specialized tools for a proper connection. Ultimately, soldering and crimping should be based on your needs and skill level.
Part 8. What is a short battery terminal?
A short battery terminal is a situation where a battery’s positive and negative terminals unintentionally come into contact. This can occur for various reasons, such as a damaged battery case or loose connections. When the terminals are short, a high amount of current flows between them, potentially leading to overheating, damage to the battery, or even an electrical hazard. Avoiding short battery terminals by ensuring proper insulation and secure connections when installing or replacing batteries is crucial.
Part 9. How do you install a quick disconnect battery terminal?
Installing a quick disconnect battery terminal is a convenient way to disconnect and reconnect the battery when necessary. Here’s a step-by-step guide to installing a quick disconnect terminal:
1. Choose the right terminal:
Select a quick disconnect terminal compatible with your battery type and size. Quick disconnect terminals are available in various styles, such as clamp-on, bolt-on, or twist-on, so choose the one that suits your needs.
2. Prepare the battery:
Ensure the battery is clean and free from corrosion or debris. Clean the battery posts using a battery post brush or a mixture of baking soda and water, if needed.
3. Attach the terminal:
Install the quick disconnect terminal onto the battery post. Follow the manufacturer’s instructions for your specific terminal type. Some terminals require tightening bolts, while others have a locking mechanism.
4. Connect the cables:
- Attach the battery cables to the quick disconnect terminal.
- Ensure the positive cable is connected to the positive terminal and the negative cable to the negative terminal.
- Tighten the connections securely.
5. Test the connection:
Once the terminal and cables are securely attached, test the connection by gently tugging on the wires. Ensure they are firmly in place and show no signs of coming loose.
Part 10. How to clean battery terminals?

Over time, battery terminals can accumulate corrosion, which can hinder the flow of electrical current and affect the battery’s performance. Here’s a simple process to clean battery terminals:
1. Gather the necessary materials:
You will need a wire brush or a battery postbrush, baking soda, water, a small container, and protective gloves.
2. Put on your protective gear:
Wear gloves to avoid contact with the battery acid or corrosion.
3. Create a cleaning solution:
Mix a tablespoon of baking soda with a cup of water in a small container. Stir the mixture until the baking soda dissolves.
4. Disconnect the battery:
Start by disconnecting the battery from the device or vehicle. Remove any cables or connectors attached to the terminals.
5. Apply the cleaning solution:
- Dip the wire brush or battery postbrush into the baking soda solution.
- Scrub the battery terminals and posts thoroughly to remove any corrosion or buildup.
- Pay attention to both the positive and negative terminals.
6. Rinse and dry:
After scrubbing, rinse the terminals with clean water to remove any remaining baking soda solution. Dry the terminals with a clean cloth or let them air dry completely.
7. Reconnect the battery:
- Reattach the cables or connectors to their respective terminals once clean and dry.
- Start with the negative terminal and then the positive terminal.
- Ensure all connections are secure.
Part 11. Conclusion
Understanding battery terminals is essential for maintaining and replacing batteries effectively. This article covered various aspects of battery terminals, including their identification, types, installation, and maintenance. By following the proper procedures for identifying, replacing, and maintaining battery terminals, you can ensure optimal battery performance and prolong the lifespan of your batteries.
Related Tags:
More Articles

Overview of Deep Cycle Lithium Battery
In this article, we explore the life, voltage, capacity, and charging considerations of deep cycle lithium batteries.
How Long do Lithium Batteries Last?
How long do lithium batteries last? we will explore the factors that influence the lifespan of lithium batteries and provide insights into their longevity.
How to Choose the Best LiFePO4 Battery?
Choose LiFePO4 batteries for superior performance, safety, and versatility in EVs, UPS, and backup power. This guide helps you make informed decisions.
Get 12v Lithium Car Battery As a Power Source for the Ride
Make the right choice for your vehicle's battery needs by installing a 12 volt lithium car battery. You will enjoy maintenance-free longevity with this change.
Everything About A Small Lithium Ion Battery
Discover the features, uses & future potential of a small lithium ion battery. A compact and tiny powerhouse ideal for smartphones, wearables, drones & more.


